
Table of Contents
ToggleMost homeowners see wall-mounted and ceiling fans as purely functional, a means to circulate air and cut cooling costs. But these workhorses can double as design elements without compromising their performance. Whether dealing with a vintage oscillating fan, a modern bladeless model, or a standard ceiling unit, the right styling approach turns these fixtures into intentional focal points. This guide walks through the selection, placement, and customization techniques that let fans enhance a room’s aesthetic instead of just fading into the background.
Key Takeaways
- Wall fan decor transforms functional cooling devices into intentional design focal points by selecting finishes that coordinate with hardware, lighting, and room aesthetics rather than treating them as purely utilitarian.
- Position wall-mounted fans as statement pieces on feature walls, above consoles, or flanking fireplaces while considering room size (12-inch for under 150 sq ft, 16-18 inch for up to 250 sq ft) to avoid visual imbalance.
- Customize generic wall fans through spray painting with high-heat paint, fabric wraps, wooden blade upgrades, or patina techniques to match your interior style—industrial, mid-century modern, coastal, or minimalist.
- Mount wall fans at 7–9 feet high depending on function, always into wall studs with proper fasteners, and coordinate airflow direction with ceiling fans to create efficient circulation loops.
- Gallery walls and feature walls benefit from careful planning: maintain 6 inches clearance around fan sweeps, install the fan first, and use contrasting colors or halos to make the circular form pop against rectangular frames.
Why Wall Fans Deserve a Place in Your Design Scheme
Wall-mounted fans solve two common design problems: they free up floor space in tight rooms and they provide targeted airflow where ceiling fans can’t reach. A well-chosen wall fan eliminates the need for bulky tower fans that crowd corners and snag vacuum cords.
From a decor standpoint, wall fans add dimension to flat surfaces. Their circular forms break up the rectangular monotony of framed art and mirrors, creating visual rhythm along a wall plane. Finishes range from brushed nickel and matte black to antiqued brass and powder-coated colors, making it easier to match existing hardware and light fixtures.
Functionality remains paramount, most wall fans tilt vertically and oscillate horizontally, directing air where it’s needed in workshops, sunrooms, or above kitchen ranges. When the design complements the room’s style, the fan reads as a curated fixture rather than an afterthought. Treat it like you would a sconce or shelf: measure placement carefully, consider scale relative to surrounding elements, and coordinate finishes with door hinges, cabinet pulls, and curtain rods.
Choosing the Right Wall Fan Style for Your Room
Match the fan’s form factor to the room’s function and aesthetic. Industrial-style fans with metal cages and exposed hardware suit workshops, mudrooms, and loft spaces with visible ductwork. These typically feature 12- to 18-inch blade diameters and three-speed rotary controls.
Mid-century modern fans offer cleaner lines, often with wooden blades and conical housings. They pair well with teak credenzas, Eames-era furniture, and rooms heavy on walnut and brass accents. Look for models with sealed ball bearings to minimize noise, critical in living areas and home offices.
For coastal or farmhouse interiors, retro-style oscillating fans with chrome or enamel finishes work best. White or pastel enamel coordinates with shiplap, beadboard, and painted brick. Verify that enamel coatings are rust-resistant if placing the fan in humid bathrooms or covered porches.
Bladeless wall fans fit contemporary and minimalist spaces where visible blades would disrupt clean sightlines. These fans use amplified airflow technology and mount flush to the wall, reading almost like a circular piece of wall art when off.
Size matters: in rooms under 150 square feet, a 12-inch fan provides sufficient circulation. For spaces up to 250 square feet, step up to a 16- or 18-inch model. Oversized fans in small rooms dominate the wall: undersized units in large spaces look like an afterthought and underperform.
Creative Ways to Incorporate Wall Fans into Your Decor
Wall fans don’t need to hide. Position them deliberately within the room’s design scheme to leverage their shape and finish.
Styling Wall-Mounted Fans as Statement Pieces
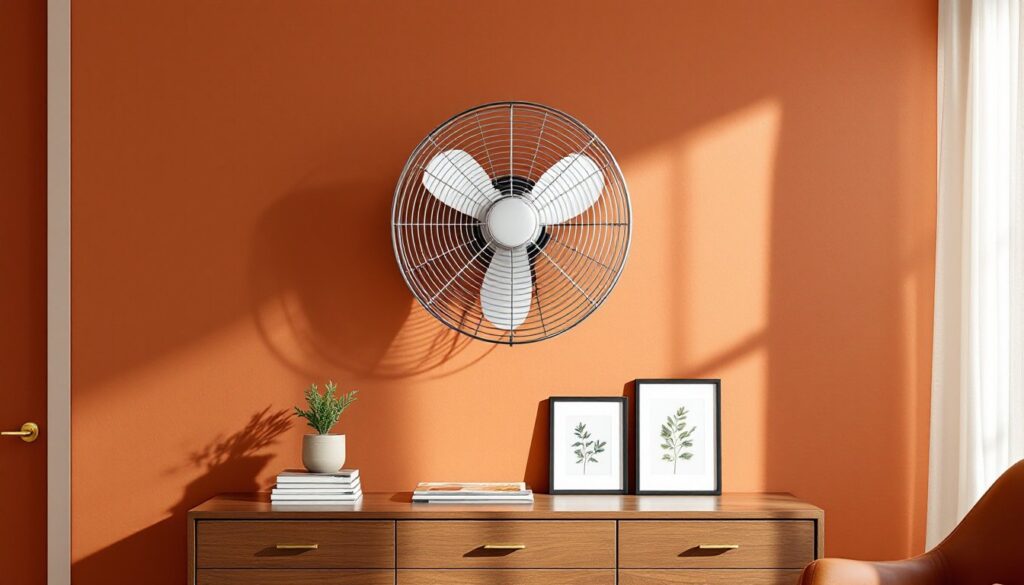
Treat a large-diameter fan the way you’d treat a statement mirror or oversized clock. Center it on a feature wall, above a console table, flanking a fireplace, or between two windows, and let it anchor the composition. Paint the wall a contrasting color to make the fan’s silhouette pop: a matte black fan against a warm terracotta wall, or a polished brass model on deep navy.
Layer lighting around the fan to emphasize its form after dark. Uplighting from a shelf below or picture lights mounted above cast shadows that highlight the blade geometry and grille details. In industrial settings, run the fan’s power cord through surface-mounted conduit painted to match the wall, turning the wiring into an intentional design element rather than a flaw.
Consider symmetry for a more formal look. Mount matching fans on either side of a long wall in a workshop or family room, spacing them evenly to create balanced airflow and a rhythmic visual beat. This approach works especially well in rooms with high ceilings where a single ceiling fan can’t reach occupied zones.
Blending Fans into Gallery Walls and Feature Walls
Integrating a fan into a gallery wall requires planning, but it pays off. Map the entire layout on the floor first, frames, mirrors, shelves, and the fan, adjusting spacing until the composition feels balanced. The fan’s circular form acts as a focal point: arrange rectangular and square frames around it to guide the eye.
Keep at least 6 inches of clearance around the fan’s full sweep to prevent frames from rattling or interfering with oscillation. Use a level and painter’s tape to mark frame positions on the wall before drilling, and install the fan first since its mounting bracket is the least forgiving.
On feature walls with board-and-batten, shiplap, or geometric paint treatments, choose a fan finish that either blends in or deliberately contrasts. A white fan on white shiplap becomes part of the texture: a copper fan on white paneling commands attention. Both approaches work, just commit to one.
For budget-friendly DIY decor projects, paint the wall behind the fan with a circle of color that extends 4 to 6 inches beyond the fan’s diameter. This halo effect frames the fan and adds depth without additional hardware or expense.
DIY Wall Fan Makeover Ideas to Match Your Aesthetic
Most wall fans ship in generic finishes, chrome, white, or builder-grade black. Customizing them takes minimal effort and produces outsized results.
Spray painting is the fastest route. Disassemble the fan housing and grille (consult the manual for motor access), clean all surfaces with degreaser, then apply self-etching primer if working with chrome or bare metal. Follow with high-heat spray paint (rated to at least 200°F) in your chosen finish. Two light coats beat one heavy coat. Reassemble after the paint cures for 72 hours.
For a patina or aged look, apply a base coat of copper or bronze spray paint, let it dry, then dab on a diluted acrylic paint in verdigris green or rust orange using a sea sponge. Seal with matte clear coat. This technique suits industrial and farmhouse styles.
Wooden blade upgrades work on fans with removable metal blades. Cut replacement blades from 1/4-inch plywood or solid wood veneer, matching the original blade length and mounting hole spacing. Sand edges smooth, apply stain or paint, then seal with polyurethane. Balance is critical, weigh each blade and sand heavier ones until they match within 0.1 ounces to prevent wobble.
Fabric wraps on grille cages add texture. Remove the grille, wrap jute rope or cotton cord around each bar, securing ends with hot glue. This works best on fans in low-humidity areas: moisture loosens adhesive over time.
Always disconnect power before disassembly. If the fan is hardwired, shut off the circuit breaker and verify with a non-contact voltage tester. For plug-in models, unplug and let the motor cool completely. Wear safety glasses when spray painting and work in a well-ventilated area or outdoors.
Placement Tips for Maximum Style and Function
Mounting height affects both airflow and visual balance. For general room circulation, install the fan 7 to 8 feet above the floor, directing airflow slightly downward. In workshops or garages, lower mounting (6 to 7 feet) pushes air into the work zone. Above kitchen ranges or prep tables, mount 8 to 9 feet up to avoid head clearance issues while still pulling heat away.
Wall stud location dictates final placement. Use a stud finder to locate 16-inch on-center framing and mark both edges of the stud. Mount the fan bracket with #10 x 2.5-inch wood screws driven into solid lumber, not just drywall. If the ideal aesthetic position doesn’t align with a stud, install a 3/4-inch plywood backer between studs during the drywall phase, or surface-mount a finished wood plaque that becomes part of the design.
In rooms with multiple fans or ceiling fans, coordinate rotation and speed. Wall fans should push air toward the ceiling fan’s downward draft in summer, creating a circulatory loop. Reverse the pattern in winter if using the ceiling fan’s reverse mode to recirculate warm air.
For narrow rooms, mount the fan on a short wall and aim it down the length of the space. In square rooms, position it on the wall opposite the primary seating area so the breeze reaches occupants without blowing papers off desks.
If renting, check the lease before drilling into walls. Some landlords permit wall fans if holes are patched upon move-out. For fully non-invasive options, creative wall decor techniques such as freestanding fan stands or tension-mounted shelving systems can support smaller fans without permanent fasteners, though these sacrifice the clean, built-in look of a proper wall mount.
Electrical considerations: Plug-in fans require a nearby outlet: plan cord routing to avoid trip hazards. For hardwired installations, consult a licensed electrician unless you’re comfortable working with household wiring and local codes. Most jurisdictions require a permit for new circuits, and incorrect wiring poses fire risk. Use a 15-amp circuit with 14-gauge Romex for standard wall fans: larger commercial models may need 12-gauge wire and a 20-amp breaker. Always verify with your local building department.