
Table of Contents
ToggleMirrored wall decor does more than fill empty space, it manipulates light, creates the illusion of square footage, and turns flat walls into architectural features. Whether installing a full accent wall in a cramped entryway or arranging decorative mirror tiles above a fireplace, mirrors offer one of the most cost-effective ways to upgrade a room’s presence. Unlike paint or wallpaper, mirrors reflect existing light sources, reducing the need for additional fixtures while making spaces feel open. This guide walks through the types, placement strategies, installation steps, and styling decisions that separate a professional-looking mirrored wall from a dated disco mistake.
Key Takeaways
- Mirrored wall decor reflects light into shadowed corners and creates the illusion of larger spaces without requiring expensive renovations or additional lighting fixtures.
- Popular types of mirrored wall decor include framed mirror panels for focal points, full accent walls requiring professional installation, and budget-friendly decorative mirror tiles in geometric or mosaic patterns.
- Entryways, hallways, dining rooms, and bathrooms benefit most from mirrored walls, while bedrooms require careful placement to avoid visual clutter and personal discomfort.
- Proper installation requires wall surface preparation, stud location, quality mirror mastic adhesive, and mechanical fasteners for heavy panels—with curing time of 24–48 hours before full use.
- Maximize impact by layering lighting intentionally, maintaining consistent framing choices, keeping mirrors clean, and reflecting intentional views rather than clutter or blank walls.
Why Mirrored Wall Decor Works in Every Home
Mirrors function as optical tools. They bounce natural and artificial light into shadowed corners, which is especially valuable in north-facing rooms or basement spaces with limited windows. A strategically placed mirror can double the perceived output of a single window, cutting reliance on overhead lighting during daylight hours.
In smaller homes and apartments, mirrors disrupt visual boundaries. A floor-to-ceiling mirrored panel behind a dining table tricks the eye into reading the room as twice its actual width. This isn’t decorative sleight of hand, it’s spatial geometry. The reflection creates a sightline that extends beyond the physical wall.
From a design standpoint, mirrors pair with nearly any style. Frameless beveled mirrors suit modern minimalism, while ornate gilt frames complement traditional or eclectic interiors. Unlike patterned wallpaper or bold paint, mirrors adapt to changing decor without requiring removal or repainting. They’re a long-term investment that holds value across multiple design cycles.
Popular Types of Mirrored Wall Decor
Framed Mirror Panels and Accent Walls
Framed mirror panels range from single oversized pieces (36″ × 48″ or larger) to collections of smaller mirrors arranged in a grid. Large panels work best as focal points, above a sofa, behind a bed, or spanning a narrow hallway. They’re typically 1/4″ thick glass with a protective backing and come with pre-installed D-rings or French cleats for hanging.
Full mirrored accent walls use frameless panels installed edge-to-edge. These require professional measurement and installation, as even minor misalignment creates visible seams. The glass is usually mounted to a smooth substrate (like drywall finished to Level 4 or 5) using panel adhesive rated for mirror weight, plus mechanical clips for initial hold. Building codes don’t typically regulate decorative mirrors, but any installation over a certain weight (usually 50 lbs total) should include wall anchors into studs, not just drywall.
Framed options offer more DIY flexibility. A wood or metal frame adds structure and hides minor wall imperfections. Frames also provide a buffer if the mirror needs removal, less risk of cracking during disassembly. Many homeowners choose designs that incorporate decorative interior elements, blending mirrors with adjacent furniture or architectural trim for a cohesive look.
Decorative Mirror Tiles and Mosaics
Mirror tiles come in standard sizes, 12″ × 12″ and 6″ × 6″ are common, and can be arranged in geometric patterns, herringbone layouts, or random mosaics. Most tiles are beveled (edges ground at a 45-degree angle) to refract light and disguise seams. Unbeveled tiles show every alignment flaw, so they’re better left to experienced installers.
Peel-and-stick mirror tiles are marketed as easy DIY solutions, but adhesive quality varies. Budget versions lose hold over time, especially in humid bathrooms or above heat sources like radiators. For permanent installations, use mirror mastic (a high-tack adhesive designed specifically for glass) applied with a notched trowel. This distributes weight evenly and prevents the corrosive effects of water-based adhesives on mirror backing.
Mosaic mirrors, small pieces arranged in artistic patterns, are typically sold as pre-assembled sheets on mesh backing, similar to glass tile. These sheets simplify installation but require a flat, clean substrate. Any lumps, old adhesive, or texture will telegraph through the thin glass. Surface prep is non-negotiable: sand, patch, prime, and check with a straightedge before committing.
Best Rooms and Placement Ideas for Mirrored Walls
Entryways and hallways benefit most from mirrored walls. These spaces are often narrow and dimly lit, making them ideal candidates for reflective surfaces. A mirror spanning the length of a hallway can turn a claustrophobic corridor into a gallery-like passage. Mount mirrors opposite windows or light fixtures to maximize bounce.
Dining rooms use mirrors to amplify candlelight and create a sense of occasion. A mirrored wall behind a buffet or bar cart reflects glassware and bottles, adding depth without clutter. Avoid placing mirrors directly opposite messy kitchens or laundry areas, they’ll double the visual chaos.
In bathrooms, mirrors are standard above vanities, but extending mirror coverage to full-wall or wraparound installations creates a spa-like effect. Use moisture-resistant adhesive and ensure adequate ventilation to prevent backing corrosion. According to interior design inspiration sources, bathrooms with mirrored walls feel larger and benefit from improved task lighting around sinks and showers.
Bedrooms require careful placement. A mirror facing the bed can be disorienting and isn’t recommended in traditional feng shui, though that’s a personal preference. Better options: behind nightstands, above a dresser, or covering a closet door. Mirrored closet doors (sliding or bifold) are a classic solution in smaller bedrooms, though they require regular cleaning to avoid looking dingy.
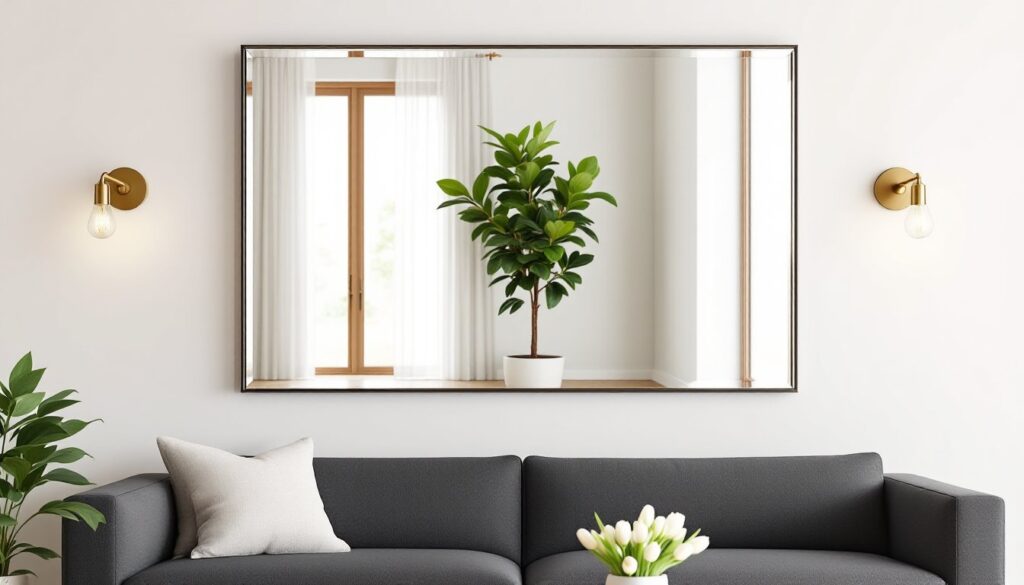
Living rooms handle mirrors well when they’re positioned to reflect intentional views, a fireplace, a piece of art, a window with a garden view. Don’t aim mirrors at clutter, electronics, or blank walls. The reflection should add value, not just duplicate emptiness. For inspiration on creative room layouts with mirrors, consider how different spaces use reflective surfaces to enhance existing features.
How to Install Mirrored Wall Decor: A Step-by-Step Guide
Tools and materials:
- Stud finder
- Level (4-foot minimum)
- Measuring tape
- Pencil
- Mirror adhesive (mastic) or construction adhesive rated for mirrors
- Mechanical fasteners: mirror clips, J-channels, or French cleats (depending on mirror weight)
- Caulk gun
- Safety glasses and work gloves
- Soft cloths and glass cleaner
Step 1: Prep the wall surface. Remove outlet covers, patch holes, and sand any texture. Mirrors require a smooth, flat substrate. Prime bare drywall or patched areas to prevent moisture from degrading adhesive. Check the wall with a straightedge, any bow or dip over 1/8″ per 8 feet will show in the reflection.
Step 2: Locate studs and mark mounting points. Use a stud finder to map out framing. For mirrors over 20 lbs, anchor into studs. For lighter decorative mirrors, drywall anchors rated for the weight will suffice. Mark stud locations lightly in pencil at the top and bottom of the planned mirror area.
Step 3: Dry-fit and measure. Hold the mirror (or a template) against the wall. Use a level to ensure it’s plumb. Mark corners and edges. For multi-panel installations, lay out spacing on the floor first, then transfer measurements to the wall. Small errors compound across multiple pieces.
Step 4: Apply adhesive. Run mirror mastic in a zigzag or dot pattern across the back of the mirror, staying 2″ away from edges to prevent squeeze-out. Don’t over-apply, excess adhesive can seep around edges and stain walls or frames. For larger panels, apply adhesive to both the mirror back and the wall.
Step 5: Set the mirror. Lift the mirror (get help for anything over 30 lbs) and press it firmly against the wall, aligning with your marks. Use gentle pressure, don’t force it. Mirror clips or J-channels installed at the bottom edge provide temporary support while adhesive cures, which can take 24–48 hours. Some installers use painter’s tape to hold lighter mirrors in place during cure time.
Step 6: Install mechanical fasteners (if needed). For heavy mirrors or accent walls, adhesive alone isn’t enough. Add mirror clips at top corners or along edges, screwed into studs or anchors. French cleats (interlocking wood or metal strips) work well for removable panels. Always wear safety glasses and gloves, broken mirror glass is sharp and difficult to clean.
Step 7: Clean and inspect. After adhesive has cured, remove any tape or temporary supports. Clean the mirror with glass cleaner and a microfiber cloth. Check edges for adhesive residue and remove it with a plastic scraper or rubbing alcohol.
Styling Tips to Maximize Impact and Avoid Common Mistakes
Layer lighting intentionally. Mirrors amplify existing light but don’t create it. Position mirrors to reflect windows, pendant lights, or sconces. Avoid aiming mirrors at bare bulbs, which causes glare. In dining rooms, place mirrors to catch candlelight from the table, this creates ambiance without additional fixtures.
Frame or don’t, but be consistent. Mixing framed and frameless mirrors in the same room usually looks disjointed unless there’s a deliberate grid or gallery-wall design. If going frameless, keep edges clean and beveled. If using frames, match finish tones (all warm metals, all cool, or all wood) even if styles vary.
Avoid the fun-house effect. Multiple mirrors facing each other create infinite reflections, which can be dizzying. If mirrors are on opposite walls, offset them so they don’t directly face one another. This is especially important in hallways and bathrooms.
Keep mirrors clean. Smudges, dust, and water spots kill the effect. In high-traffic or humid areas, plan on weekly cleaning. Use a glass cleaner without ammonia for mirrors, as ammonia can corrode the backing over time. Microfiber cloths prevent streaking better than paper towels.
Don’t over-mirror. A single statement mirror is more effective than covering every available wall. Too much reflection can make a room feel cold or impersonal. Balance mirrored surfaces with textured walls, wood furniture, and soft textiles to maintain warmth.
Consider what you’re reflecting. Before committing to placement, stand where the mirror will go and note what it will show. If it reflects a cluttered desk, an awkward angle of the TV, or a blank wall, reposition. The reflection should enhance the room, not broadcast its flaws.