
Table of Contents
ToggleMinecraft’s blocky aesthetic translates surprisingly well to physical wall decor, offering a unique design opportunity for gaming rooms, kids’ bedrooms, or creative spaces. The game’s pixelated style makes it easier to recreate than most video game themes, no professional painting skills needed. Whether tackling a simple weekend project or a more involved room transformation, Minecraft-inspired wall treatments range from basic printables to full accent walls. These projects work for renters and homeowners alike, with options that leave walls intact or go bold with permanent installations. Most require common craft supplies and basic tools already sitting in a workshop or junk drawer.
Key Takeaways
- Minecraft wall decor projects range from budget-friendly printables and vinyl decals to DIY foam blocks and painted accent walls, making this aesthetic accessible to renters and homeowners at any skill level.
- The geometric, blocky nature of Minecraft wall decor eliminates complex design work—simple squares and rectangles are achievable with basic craft supplies and standard tools already at home.
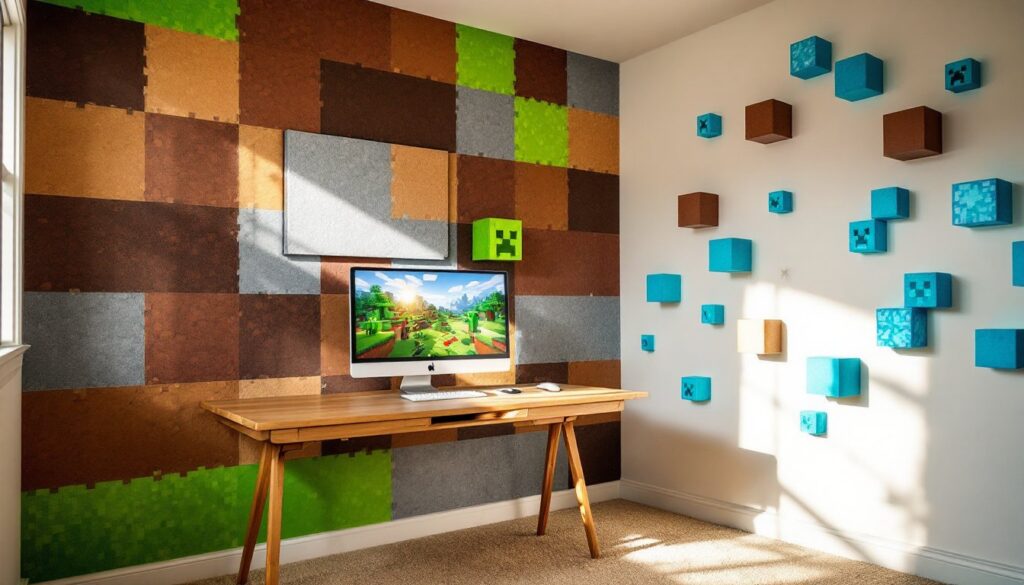
- 3D foam block art can be created affordably by cutting foam board into 6-inch squares, painting them with acrylic craft paint to match in-game textures, and mounting with removable adhesive strips.
- Minecraft-themed wall decor ages better than typical character-based themes; shifting from bright colors to muted earth tones transforms kids’ décor into retro pixel art that appeals to older teens and adults.
- Painted accent walls deliver maximum impact but require 8–12 hours of prep, taping, and painting across two days—this option suits homeowners ready for permanent installation rather than renters or temporary designs.
Why Minecraft-Themed Wall Decor Is Perfect for Any Gaming Room
The game’s geometric design eliminates complex curves, gradients, or fine detail work that plague most character-based themes. A Minecraft Creeper face is just squares and rectangles, achievable with painter’s tape and a steady hand.
This theme grows with kids better than cartoon characters. A twelve-year-old obsessed with Minecraft today might roll their eyes at the same décor at fifteen, but the abstract, industrial-chic quality of block-based designs holds up as tastes mature. Swap bright greens for muted earth tones, and suddenly it’s “retro pixel art” instead of “kids’ game.”
Minecraft décor also scales to any budget. Printable posters cost only ink and paper. Foam board runs a few dollars at craft stores. A full painted accent wall requires only standard latex paint in a handful of colors. There’s no pressure to buy licensed products at markup when the aesthetic is this geometric and open to interpretation.
The modular nature of Minecraft blocks encourages mix-and-match installations. Mount a few 3D foam cubes this month, add vinyl decals next season, and paint a feature wall next year, each phase stands alone while building toward a cohesive look.
DIY Minecraft Block Wall Art
Creating dimensional block art mimics the game’s signature look better than flat prints. The process is straightforward: cut foam into cubes, apply color and texture, then mount. This project works well for renters since blocks attach with removable adhesive strips rated for the cube weight.
Materials needed:
- Foam board (½-inch or ¾-inch thickness)
- Craft knife or hot wire foam cutter
- Metal straightedge
- Acrylic craft paint (brown, green, gray, tan, match in-game block textures)
- Foam brushes or sponges
- Removable mounting strips or picture hanging wire
- Sandpaper (120-grit for smoothing edges)
Creating 3D Foam Block Decorations
Step 1: Measure and mark 6-inch squares on foam board. This size balances visual impact with material economy, a standard 20×30-inch foam sheet yields twelve faces. For larger cubes, scale to 8 or 10 inches, but remember wall space fills quickly.
Step 2: Cut squares using a sharp craft knife against a straightedge. Make multiple shallow passes rather than forcing through in one cut, foam compresses and tears if rushed. A hot wire cutter (available at craft stores for $15-30) produces cleaner edges with no blade dulling.
Step 3: Lightly sand cut edges to remove crumbles and burrs. Wipe with a dry cloth before painting.
Step 4: Paint block faces to match Minecraft textures. For a dirt block, use brown base with darker brown speckles applied with a sponge. Grass blocks get green tops with brown sides. Stone requires gray with darker veining. Reference in-game screenshots for color accuracy. Apply two coats, letting each dry 30-45 minutes.
Step 5: Assemble cubes with hot glue or construction adhesive if creating true 3D blocks. For wall-mounted installations, many DIYers skip full cubes and mount single painted squares in a grid pattern, it reads as dimensional from across a room while using less material.
Step 6: Attach to wall using removable mounting strips rated for each block’s weight. A 6-inch foam cube weighs roughly 2-4 ounces: use strips rated for at least 1 pound per block to account for adhesive degradation over time. Space blocks randomly or in clusters that mimic mined terrain.
Pro tip: Seal painted foam with clear acrylic spray to prevent paint transfer if blocks get bumped. Apply outdoors or in a well-ventilated space, foam is porous and absorbs fumes.
Printable Minecraft Posters and Canvas Prints
High-resolution printables offer the fastest route to finished wall décor. Fan communities and digital marketplaces provide files designed at poster scale, though basic image editing skills allow customization of in-game screenshots.
Print options:
- Home inkjet printing: Works for 8×10-inch to 11×17-inch sizes if the printer supports larger paper. Standard photo paper produces acceptable results. Cost: $3-8 per print depending on ink consumption.
- Office supply print services: Handle up to 24×36-inch posters on heavier stock. Pricing runs $15-40 based on size and paper weight. Matte finish hides pixelation better than glossy for blocky graphics.
- Canvas prints: Online services stretch digital files onto gallery-wrapped canvas (image wraps around 1.5-inch deep wooden frames). A 16×20-inch canvas typically costs $30-60. The texture adds legitimacy to pixel art.
When sourcing images, verify resolution matches print size. A 1920×1080 screenshot looks fine at 10×6 inches but pixelates badly at poster scale. Aim for at least 150 DPI at final dimensions, a 24×18-inch poster needs a 3600×2700 pixel source file.
Framing elevates printables from “kids’ room” to intentional décor. Black frames keep focus on the art. For a cohesive gallery wall, print multiple scenes or biomes at the same size and use identical frames with white or black matting.
DIY tip from Instructables: mount prints to foam board backing before framing to prevent sagging, especially for larger posters. Use spray adhesive in a ventilated area, smoothing from center outward to avoid bubbles.
Minecraft Wall Decals and Stickers
Vinyl decals split the difference between permanent paint and temporary posters. Quality removable wall vinyl peels off cleanly without damaging paint or drywall, making it ideal for apartments or kids’ rooms that need updating as interests shift.
Commercial vs. DIY decals:
- Pre-made decals: Online retailers sell Minecraft character and block sets ranging from $12-50 depending on size and quantity. Look for decals specifically labeled “removable” rather than “permanent”, the adhesive formulation matters. Repositionable vinyl allows adjustments during application.
- DIY vinyl cutting: Craft cutters like Cricut or Silhouette machines cut custom designs from vinyl sheets. This route makes sense if planning multiple projects or wanting non-standard designs. Vinyl rolls cost $8-15 for enough material to cover 3-4 square feet.
Application tips:
- Prep the wall: Wipe with a damp cloth to remove dust. Let dry completely. Decals stick poorly to textured surfaces, they work best on flat or eggshell paint finishes, not heavy orange-peel texture.
- Plan layout: Use painter’s tape to mock up positioning before peeling backing. Measure from ceiling or floor for level alignment rather than eyeballing it.
- Apply slowly: Peel backing and press from one edge, smoothing as you go with a credit card or squeegee. Work out air bubbles immediately, they’re harder to fix once adhesive sets.
- Wait before adjusting: Removable vinyl needs 10-15 minutes to bond. Pulling too soon can stretch the material.
Decals work particularly well for accent walls where full paint coverage feels like overkill. A scattering of grass blocks, ore chunks, and tool icons creates visual interest without overwhelming a space. Many homeowners comfortable with budget decor projects find vinyl easier to execute than multi-color paint jobs.
Building a Minecraft-Inspired Accent Wall
A painted accent wall delivers maximum impact but requires commitment, this isn’t a weekend project for first-time painters. Budget 8-12 hours across two days for proper prep, taping, painting, and cleanup.
Materials and tools:
- Painter’s tape (1-inch and 2-inch widths)
- Latex paint in Minecraft-appropriate colors (greens, browns, grays, blues)
- Primer if painting over dark or glossy walls
- Paint roller with ½-inch nap for smooth walls
- 2-inch angled brush for edges
- Drop cloths
- Level and pencil
- Ladder rated for user weight
Step 1: Choose a design. The simplest approach mimics stacked Minecraft blocks, a grid of squares in dirt, stone, grass, and ore textures. More ambitious painters recreate biome scenes with horizon lines and layered terrain. Sketch the layout on graph paper first, assigning each square a color.
Step 2: Prep the wall. Fill nail holes with spackling compound, let dry, and sand smooth. Wipe dust with a tack cloth. If the existing wall color is bold or the finish is glossy, apply one coat of primer for better coverage and adhesion.
Step 3: Map the grid. Use a level and pencil to mark horizontal and vertical lines forming your block grid. For 12-inch blocks, a standard 8-foot-tall wall accommodates eight rows. Measure from the ceiling down to keep the grid level, floors often aren’t perfectly even.
Step 4: Paint the base color. Choose the most common color in the design (often a mid-tone brown or gray) and roll it over the entire wall. Two coats ensure even coverage. Let each coat dry per manufacturer instructions, usually 2-4 hours.
Step 5: Tape and paint accent blocks. Once the base is fully dry, use painter’s tape to mask off individual blocks. Paint one color at a time, removing tape while paint is still slightly wet (typically 30-60 minutes after application) for clean lines. Wait for each color to dry before taping adjacent blocks.
Step 6: Add texture details. Use a small brush or sponge to dab on highlights and shadows that mimic Minecraft’s shading. Light browns on dirt blocks, darker gray veins on stone, bright pixels on ore blocks. Reference game textures but don’t stress perfect replication, the overall effect matters more than pixel-perfect accuracy.
Safety notes: Ensure adequate ventilation, especially when working with primer. Wear a dust mask during sanding. Use a sturdy ladder with rubber feet on hard floors: never stand on the top two rungs.
This type of permanent installation may affect security deposits in rentals. Check lease terms before painting, or consider whether removable options better fit the situation. Homeowners should note that bold themed walls can affect resale appeal, neutral buyers may see it as work to undo. That said, contemporary modern decor trends increasingly embrace accent walls, especially in kids’ rooms and recreational spaces where personality is expected.
Conclusion
Minecraft wall decor projects span skill levels and commitment thresholds. Printables and decals suit renters or anyone testing the waters. Foam block art adds dimension without tools beyond a craft knife. Painted accent walls demand more time and permanence but deliver a custom result that store-bought décor can’t match. Choose the approach that fits available time, budget, and willingness to make long-term changes, then start building.